The hardest part about getting your saw filed by me is finding a box to ship it in. Back in the old days, I used to make the boxes I shipped saws in using the process shown below. I have never had a box like this fail and I have shipped saws to six of the seven continents.
You will need to find the mailer tube that Fedex or UPS uses to ship documents. You can usually find them at Fedex Kinkos for free. I think they take a dim view of people using their shipping supplies for stuff like this, but I always used Fedex tubes and shipped Fedex Ground, so I am guessing they won't mind as long as they get some business out of it.
Finally, I put this out here to help you get your saw properly boxed to ship to me for filing. Please don't write and ask me questions about how to make a box. It should take about 10 minutes from start to finish. It really isn't hard, you just need a sharp utility knife, something to cut on and something to guide your cut.
To package your saw, you will need some newsprint or craft paper and packing tape.
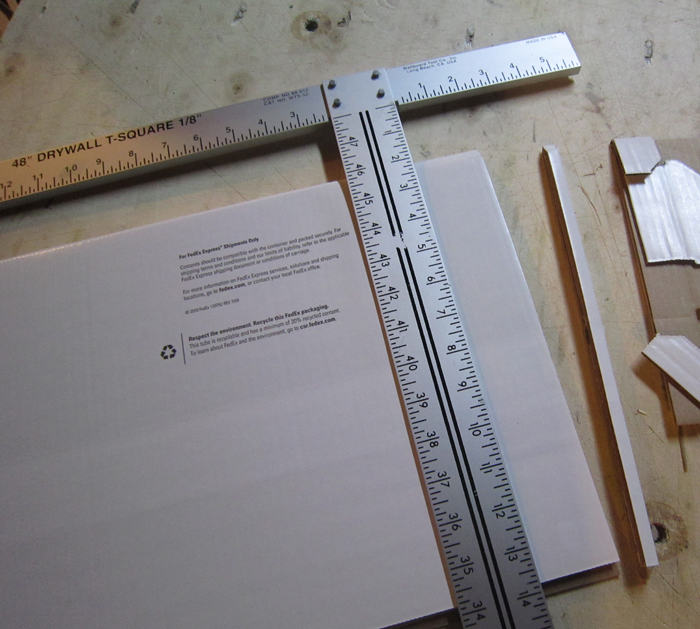
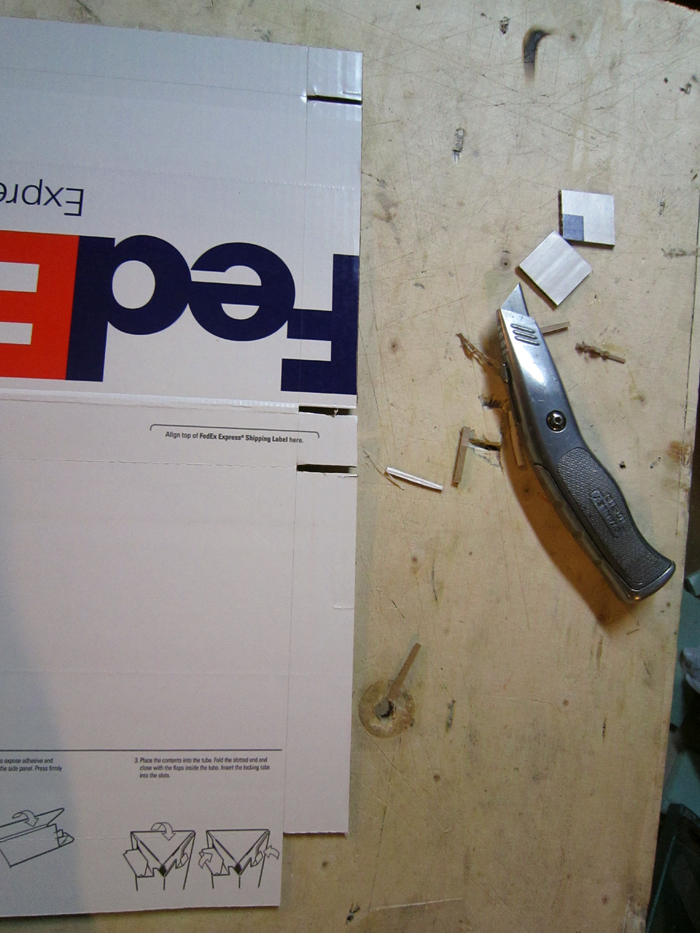
Start with a sharp utility knife and something flat to cut on. I use an old piece of plywood. A T-square used to score drywall is nice, but anything straight to guide your cut will work.
Cut the tabs off the one end. There is a slot that you can use to define the depth of the cut.

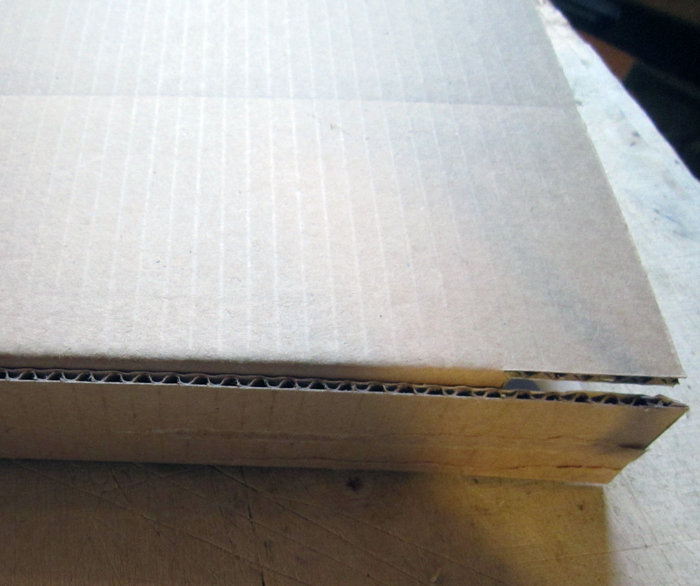
Next, flip the box around and cut off the end that is folded over. There will be four thicknesses of cardboard here, so it will take several passes. The exact amount isn't important, but 1/2" is what I usually do.
When done, throw away the waste from both ends.
Next, open the box up and peel off the glued piece of cardboard that was part of the end that you cut the 1/2" strip from. You can throw that away too.
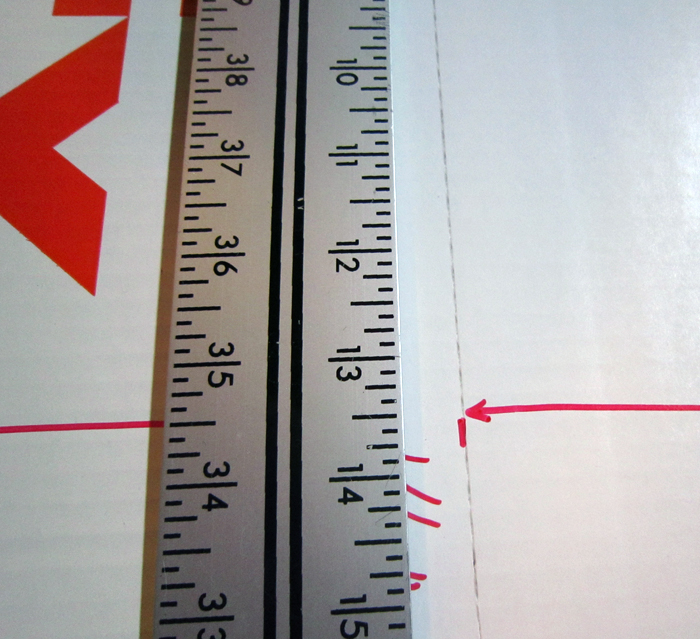
Now, open the box up and lay it flat. with the self adhesive strip the the right, take your cutting guide and cut off about 3/4" to 1" of material as shown at right.
As you get to the extreme end the the cutting edge, hold the guide down tight...it will want to move as the lever arm is very long at that point.
Throw the waste away.
OK, at this point you should have a big piece of cardboard with a seam more less in the middle.
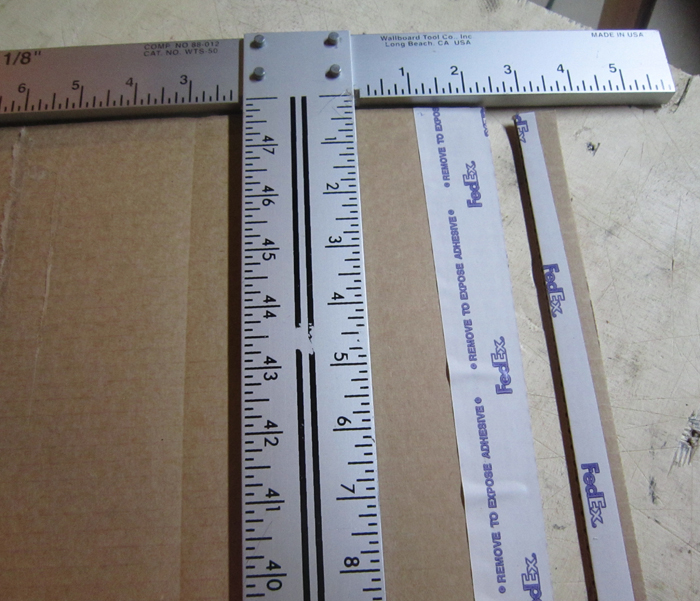
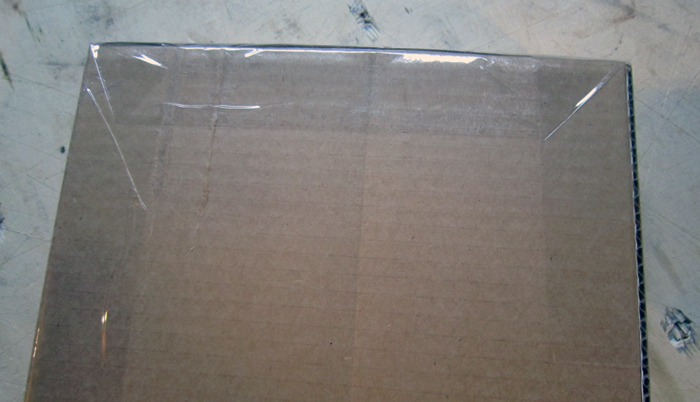
Take the cardboard and flip it over with the adhesive strip at the top and the printed side up as shown at right.
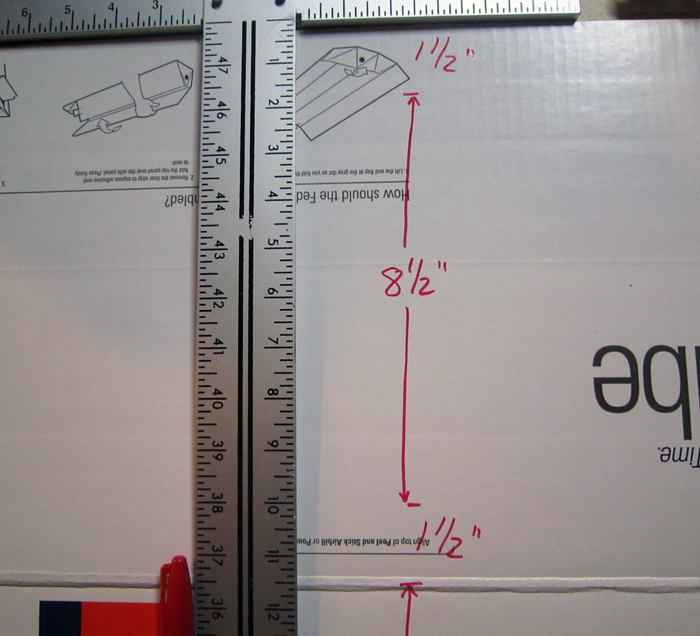
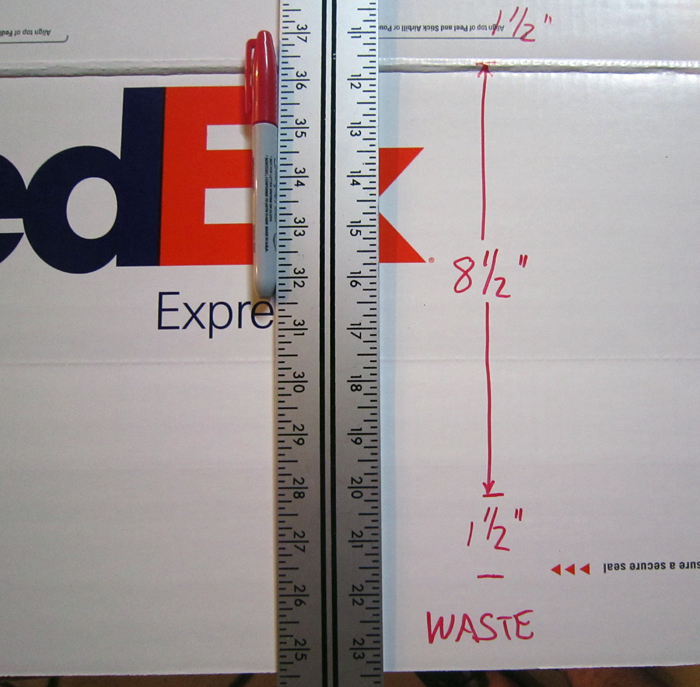
Take a measure and mark the box 1 1/2" down from the top.
Next, at the major seam where the box was originally folded, measure up 1 1/2" from the middle of the seam as shown at right.
Last, measure between those two marks. In my example at right, the measurement is 8 1/2". Write it down so you don't forget.
Now, let's continue with the layout.
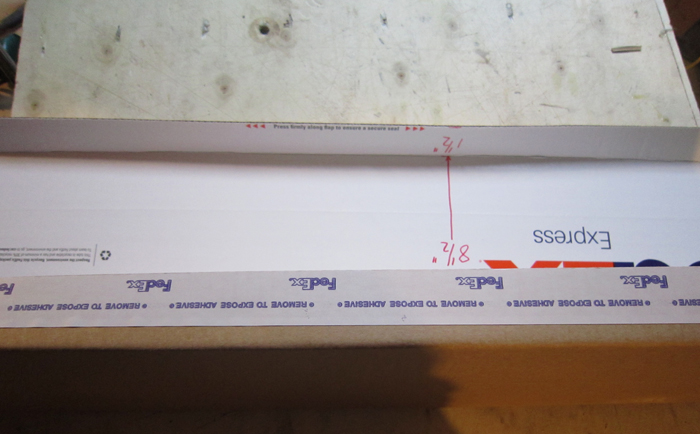
Starting in the middle of the seam, measure down the same amount between the two 1 1/2" tabs that you measured and wrote down above.
In my example it's 8 1/2, but in your case it depends on how the box measurement might have changed or how much you cut off the glued tab once the box was flat.
Next, measure another 1 1/2" down. The part past the last tab is waste and will be cut free as shown.
The idea is that you will have 5 tabs:
One that is 1 1/2" with adhesive
One that is ~8 1/2"
One that is 1 1/2"
One that is ~8 1/2"
One that is 1 1/2"
Exactly in that order.
Now we will score a line the entire length of the box where we made the marks so we can more easily fold the box.
You will need to make 3 score cuts. Press hard enough to cut 1/3 of the way through the cardboard. The idea is that you are just making a sport to more easily fold the box up.
The last cut you will cut off completely, the car board that is left over and was marked as waste above.
It's not necessary to score the major seam that is where the box was originally folded. You will fold it back the other direction. No need to cut it.
We're almost ready to fold this box up and get it in the mail.
The last step before we do that however, is to cut 1 1/2" wide score along each end as shown at right.
Next, cut about 1/16" on either side of the scored line, stopping at the scored line you just made. These are the tabs that make the end of the box.
Note that you will need to completely cut the tab out at the end with the adhesive. If you don't, there will be a double tab at that end of the box. You will want to make sure that you cut both ends as shown on the same (adhesive) side of the box.
The area I'm talking about is in the lower right in the photo.
It's time to fold this box up. You want the printed side inside, and the white side inside the box. I actually use Fedex to ship saws, and if the white side was out, they might upgrade the delivery to express which would be very expensive.
There is nothing hard about folding the box. With the white side up, crease the box where you made the score marks. I actually fold the tab completely flat and move from crease to crease until the box looks like what is shown at right.
Next, remove the adhesive strip cover, and making sure that the tab is on the inside and all the way against the other side of the box, press along the outside tab.
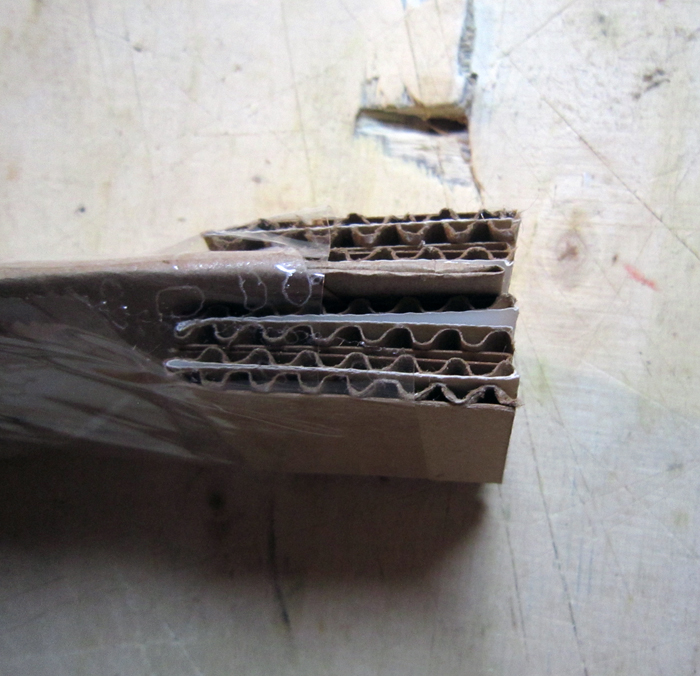
When you are done, you should have a tube that is 8 1/2" wide, open on both ends, and 1 1/2" thick.
Press carefully and make sure the glue holds.
You've probably noticed that there are some fold lines in the box which we didn't use. If you are over zealous in your folding and handling, you might bend the box along those fold lines. It's not the end of the world, but you should it if you can. You can see such a score line in the picture at the right near the top of the photo.
Now it's time to close one of the ends.
Fold the narrow tabs in, then the wide tabs that are the end of the box.
When you are done, take some packing tape and tape the tab down. I like to cut a piece as wide as the box.
Once it is down, I then take a piece that is about 6" longer on each side and tape it again. The difference is you are going down the edges which will make it harder for the box to open.
Press the top and sides, then fold the sides in, picture box style, and then fold the top down.
Last, reinforce the adhesive glued edge with tape just in case as shown at right.
At this point, your box is ready to use.
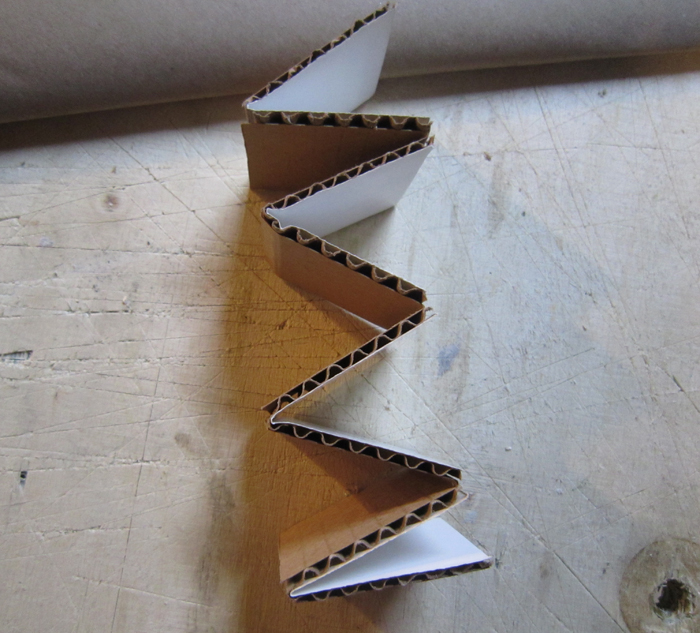
You can easily fit two saws in the box with a handle at each end. If you are only shipping one saw, you should make a stop to put on the narrow end of the blade for the packing material to press against.
Use the waste strip that was left over from the step where we scored the fold lines. Score the cardboard about an 1 1/2" in from one end, fold, score again, and so on until you have something that looks like what is shown at right.
Now it's time to get your saw ready.
Before you do that though, we need to put some padding in the bottom of the box. I like to use a couple of handfuls of recycled Styrofoam peanuts. The have great cushion and passing the blasted things on to someone else always makes me smile.
If you don't have any peanuts, use wadded up newsprint. you want at least 2-3" of padding in the end of the box. This is the end the handle will go against if you are shipping a single saw.
Take your saw and wrap it in newsprint or craft paper. Tape it just enough to cover the saw and keep it from getting scratched up in transit. Avoid using glossy newsprint, it sometimes runs and leaves marks on the saw.
One wrapped up, if you are shipping one saw, take the accordion like stop and put the blade in the middle and tape around the end to hold it in place as shown at right.
With the padding in the end of the box, slide the saw in, handle first until it stops and is snug.
If you are shipping two saws, put one on top of the other with a handle at each end. Take some packing tape and tape them together. If you are shipping two saws, you don't need the accordion like stop.
With the saw(s) in the box, take newsprint and wad it up and pack the open end of the box. You should have a couple inches of space. If not, you have too much padding in the other end. Take the saws out and remove some and continue until both ends have equal padding.
Fold the flaps as before and tape the end shut with two passes of tape.
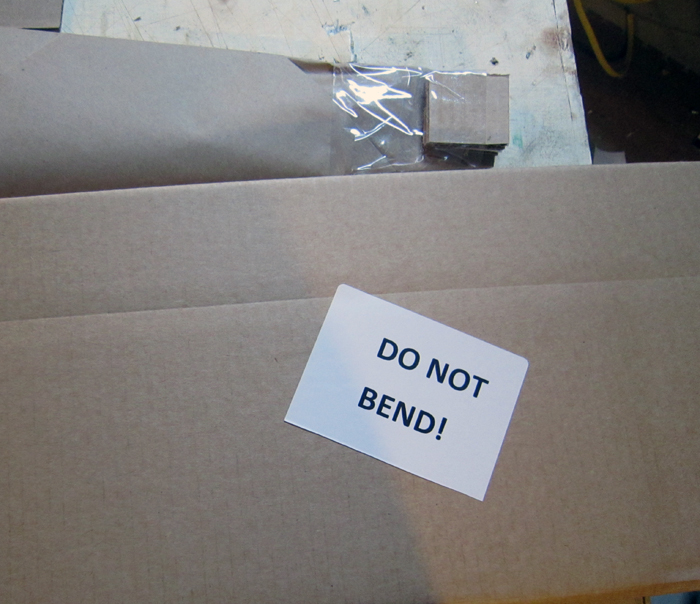
I like to print stickers as shown to make sure that Fedex / UPS or USPS don't bend the saws inside the box and damage them.
Your saw is ready to ship. One saw with packing should be 3 pounds, two saws should be about 5 pounds.