 I'm
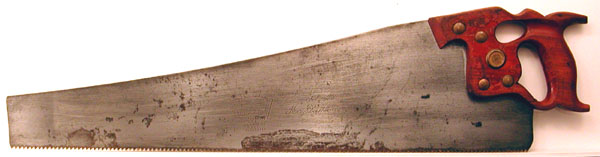
often asked about the method I use to clean saws that I find.
Typically, when you find a saw in an antique store or at an action,
it has some rust on the blade, dirty handle and other cosmetic
defects.
I'm
often asked about the method I use to clean saws that I find.
Typically, when you find a saw in an antique store or at an action,
it has some rust on the blade, dirty handle and other cosmetic
defects.I'm
often asked about the method I use to clean saws that I find.
Typically, when you find a saw in an antique store or at an action,
it has some rust on the blade, dirty handle and other cosmetic
defects.
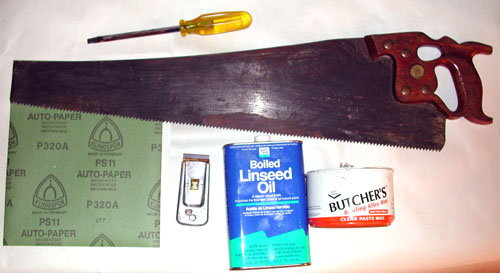
The good news is that with a very small investment, you can obtain all the materials that you need to clean and rejuvenate your saw. You will need a thin bladed screwdriver to remove the handle, some mineral spirits to lubricate the blade, some silicon carbide sandpaper to remove rust on the blade, a razor blade holder, some boiled linseed oil to give the handle some protection, some steel wool, paper towels, rags and paste wax.
A note about safety. Both boiled linseed oil and mineral spirits can burn down your house or shop! Use both with care and caution to ensure that you complete your restoration in a safe manner. Rags that have been soaked in boiled linseed oil can burst into flames if they are allowed to dry in a pile on your floor. When you are done with rags soaked in boiled linseed oil they should be placed outside away from your house laid flat. When dry, discard in the trash. In a similar vein, mineral spirits are flammable. When using it, keep the vapor away from open flame (like your gas fired boiler or hot water heater). Place rags soaked in mineral spirits in a plastic bag and then place outside away from buildings when finished to allow them to dry. Never leave mineral spirit soaked rags unattended in your house or shop. Following these few rules will allow you to complete your saw cleaning without incident. Vintage Saws assumes no responsibility for any damage that may result from combustible materials. If you are not comfortable with either of these materials--don't use them!
Finally, cleaning a saw is messy work. Consider wearing a pair of solvent resistant gloves. I like the kind used in garden work since they are made of cotton and breath. Exposure to mineral spirits has been associated with nerve damage...so limit your exposure!
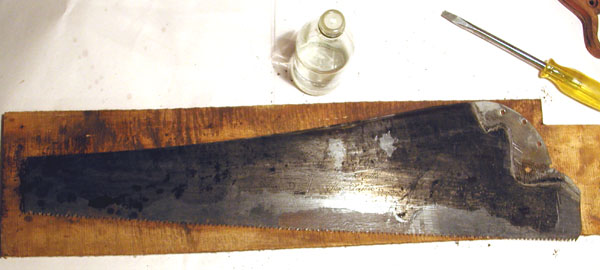
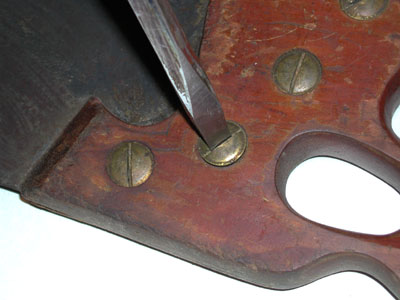 To begin, use a properly fitting
screwdriver to remove the screws from your saw. Most all screwdrivers
off the shelf will require the blade to be ground thinner to fit
the slot of domed saw screws. Place the screws in a safe place
so they don't get lost. Pull the handle off. It may take some
effort especially if the blade is heavily rusted.
To begin, use a properly fitting
screwdriver to remove the screws from your saw. Most all screwdrivers
off the shelf will require the blade to be ground thinner to fit
the slot of domed saw screws. Place the screws in a safe place
so they don't get lost. Pull the handle off. It may take some
effort especially if the blade is heavily rusted.
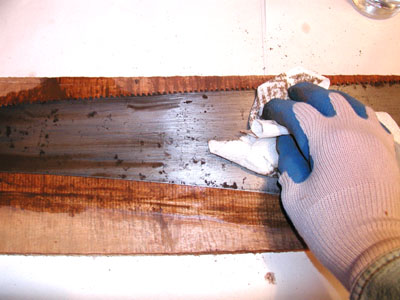
 Once the handle is
removed, place the blade on a flat board and scrape the crud from
around the handle area. Very often dirt, grime, built up wax and
oil will collect on the blade around the handle. Use a single
edged razor blade at a low angle to remove the dirt. Take care
not to scratch the blade.
Once the handle is
removed, place the blade on a flat board and scrape the crud from
around the handle area. Very often dirt, grime, built up wax and
oil will collect on the blade around the handle. Use a single
edged razor blade at a low angle to remove the dirt. Take care
not to scratch the blade.
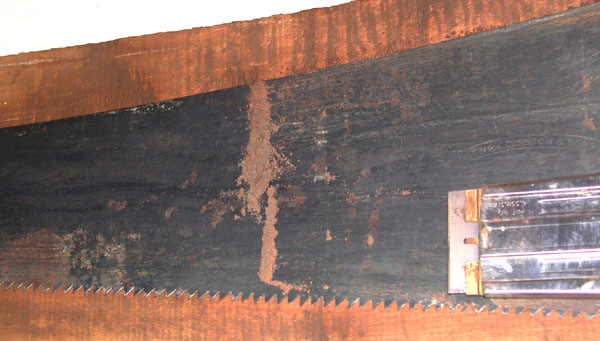
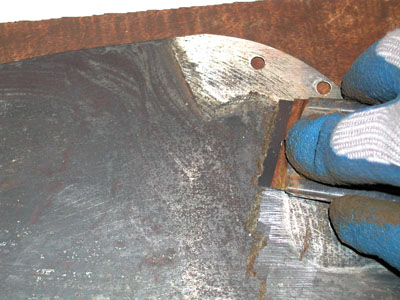
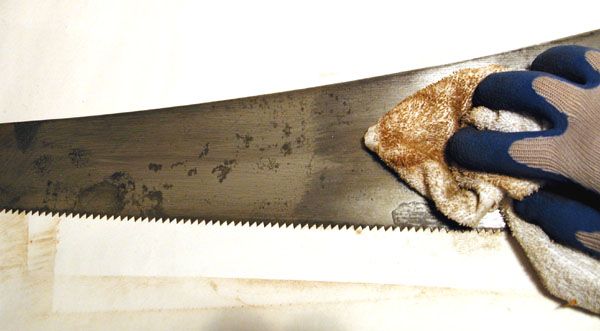
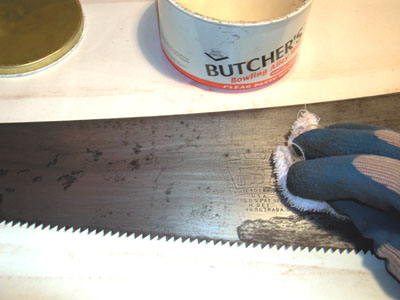
Continue to scrape one side of the blade and then the other. It is far easier to remove the rust with a razor blade than it is to remove it by sandpaper. Again, take care not to scratch the blade. In the picture above the rust and dirt that has been scraped from the handle to the etch area on the blade can be seen. When you reach the toe of the saw, drop the dirt into a bag. Repeat on the reverse side of the saw blade.
Once the blade has been scraped free of loose rust and dirt, apply a small amount of mineral spirits to the blade. I like to use an old hot sauce bottle. It allows just the right amount of mineral spirits to be applied to the blade. Note, mineral spirits are flammable and have been associated with neurological damage. If you can, do this outside. If not, wear a respirator designed to remove organic solvents from breathing air.
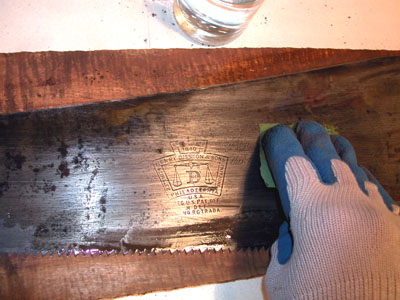 Next, tear off a 2" square
of silicon carbide sandpaper. I usually use 320 grit, although
if a saw is heavily rusted, you may want to start with 220. Rub
the blade with the sandpaper using the mineral spirits as a lubricant.
Rub in strokes that are parallel with the length of the blade.
You are only trying to remove the loose rust and dirt that the
scraping left behind. Don't try to get the blade bright. In most
all cases you will never be able to make the blade bright like
it was when it was new. You are only trying to remove the rust
so it doesn't discolor your work when you use the saw.
Next, tear off a 2" square
of silicon carbide sandpaper. I usually use 320 grit, although
if a saw is heavily rusted, you may want to start with 220. Rub
the blade with the sandpaper using the mineral spirits as a lubricant.
Rub in strokes that are parallel with the length of the blade.
You are only trying to remove the loose rust and dirt that the
scraping left behind. Don't try to get the blade bright. In most
all cases you will never be able to make the blade bright like
it was when it was new. You are only trying to remove the rust
so it doesn't discolor your work when you use the saw.
 Once the saw blade
has been cleaned with the sandpaper, use some absorbent paper
towels to wipe off the bulk of the mineral spirits and dirt. I
use just regular bounty towels. Remember that towels soaked in
mineral spirits are flammable!
Once the saw blade
has been cleaned with the sandpaper, use some absorbent paper
towels to wipe off the bulk of the mineral spirits and dirt. I
use just regular bounty towels. Remember that towels soaked in
mineral spirits are flammable!
Repeat this and the previous step for the other side of the blade and set the blade aside to completely dry.
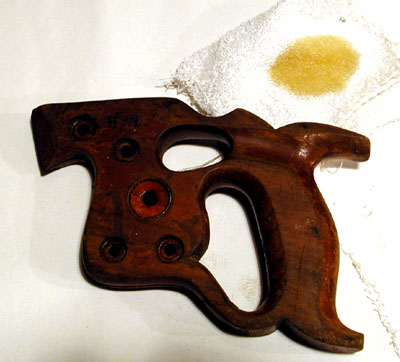
 Next, it's time to
clean the handle. There is usually a build up of dirt around the
slot in the handle that accepts the blade. You can scrape off
the bulk of the dirt with a razor, and finish with some steel
wool. Paint splatters can be carefully scraped off and the last
traces removed with some 0000 steel wool soaked in a small amount
of mineral spirits.
Next, it's time to
clean the handle. There is usually a build up of dirt around the
slot in the handle that accepts the blade. You can scrape off
the bulk of the dirt with a razor, and finish with some steel
wool. Paint splatters can be carefully scraped off and the last
traces removed with some 0000 steel wool soaked in a small amount
of mineral spirits.
If the finish on the handle is complete, you don't need to do anything further to it. If the handle looks dry and has a lot of scratches, it could benefit from an application of boiled linseed oil.
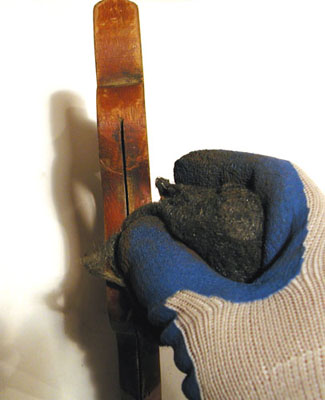
 Place a small amount
of boiled linseed oil on a small rag. I like to use a piece of
an old cotton bath towel. Make sure you use boiled linseed oil
and not just linseed oil. Ordinary linseed oil takes forever to
dry.
Place a small amount
of boiled linseed oil on a small rag. I like to use a piece of
an old cotton bath towel. Make sure you use boiled linseed oil
and not just linseed oil. Ordinary linseed oil takes forever to
dry.
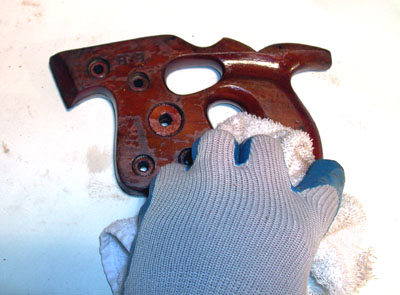 Apply the boiled linseed oil
liberally to the handle ensuring all surfaces are coated. Repeat
and place in a warm place to dry for about an hour. Remove the
excess boiled linseed oil with a clean dry rag. The handle will
still be a little wet, but will dry completely in a day or two.
Apply the boiled linseed oil
liberally to the handle ensuring all surfaces are coated. Repeat
and place in a warm place to dry for about an hour. Remove the
excess boiled linseed oil with a clean dry rag. The handle will
still be a little wet, but will dry completely in a day or two.
Remember that boiled linseed oil soaked rags can spontaneously combust if not properly disposed of!
If you now look at the blade, you will notice that a fine haze has appeared. This is residue from the mineral spirits and rust particles. Use a rag to buff off the residue.
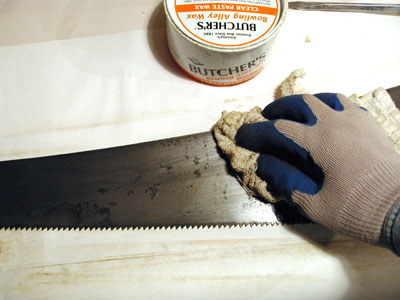
 So the blade doesn't rust again,
apply a coat of paste wax with a small rag. Apply a good coat
to both sides and let dry for about 10 minutes. A blade that has
been coated with wax is resistant to further rusting and cuts
much more smoothly.
So the blade doesn't rust again,
apply a coat of paste wax with a small rag. Apply a good coat
to both sides and let dry for about 10 minutes. A blade that has
been coated with wax is resistant to further rusting and cuts
much more smoothly.
 Finally, buff off the excess
paste wax with a clean rag. Press hard and vigorously to remove
all the excess wax.
Finally, buff off the excess
paste wax with a clean rag. Press hard and vigorously to remove
all the excess wax.
Reassemble the handle on the blade, ensuring that you properly align the medallion screw.
When you are finished, no one will mistake your saw for new. However, you will have converted a saw that was unusable to one that can now do useful work. The next step is to sharpen and set the saw. Learn how by consulting the web famous saw filing primer located here. Always consider the age and rarity of a saw before undertaking a restoration. In general, only do as much cleaning as you need to. This saw was in very bad shape and needed the works. Not all saws need to have the handles removed or blades cleaned to this extent. As always, dispose properly of flammable rags.